Pulling up Carpet – An Easy DIY Project for Beginners
You’ve decided to freshen up your home décor by pulling up carpet. How exciting! If you’re like me, you are probably doing all the research you can to learn how to complete this as a DIY project. As a DIY’er myself (after I found hardwood under our carpet), I am going to walk you through the steps we took pulling up carpet in our home.
You’ll learn what to expect when ripping up carpet, steps on how to remove wall to wall carpet, how to cut up carpet for disposal, and how to pull up carpet tack strips.
After learning these simple and easy steps, you will be a pro at this easy DIY home improvement project.

This post is all about best practices for pulling up carpet and an easy DIY project for home improvement.

Tools and Supplies
Coated General Purpose Utility Construction Gloves – These will help protect you from nails, staples, cuts and scrapes. It also helps with gripping the carpet and tools.
Disposable Dust Masks – These are debatable. I have seen people use them and not use them. I didn’t use them when I pulled my carpet, but I think I should have. There will be a lot of dust and, if this is a house unknown to you, I would recommend wearing a mask to protect you from anything that could fly out of the carpet/flooring.
Puller/Lifter/Prybar – A V-shaped flat head pry bar of at least 15-inches will work, but you can use a 20-inch if that is more comfortable for you. This will double as a puller (if you need to pull baseboards) as well as a nail puller. If you are working in a tight space, you can use a 10-inch prybar/nail puller.
Heavy Duty Utility Knife – Sharp enough to cut cardboard boxes will work for carpet as well. Make sure you are using one that has the safety features of retracting (if it doesn’t, don’t leave it lying around).
Vise Grip Pliers – I didn’t grab a picture of the ones we used. Either slip joint, needle nose, or diagonal. If you can get a set of all three, that would be great to have on hand, but to get the job done, honestly, either one will do. This is just to pull the carpet up from the corner. You need something to grip it.
What to expect when pulling up carpet
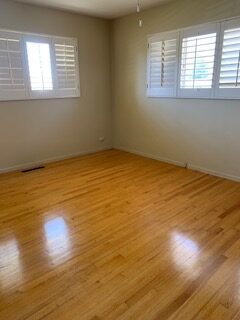
You can expect to find just about anything. In our home, we were so pleased to learn that we had custom milled red oak floors under our carpet. The floors were installed when the house was being built. Based on the width of the plank, we were able to determine these floors were milled on-site. This is something that costs mega bucks in today’s market, so we were very excited to find these! Unfortunately, this is not always the case.
In our example, as we pulled carpet, we found each bedroom and main hallway was red oak. When we got to the dining room and family rooms, we found old vinyl tiles. At the front entrance, we found another kind of tile and cement (evidence of a past remodel). Finding things like this will change the scope of your work, not to mention safety and budgeting.

Safety first. Before you cut into your carpet, investigate small sections at a time, especially if working in multiple rooms and don’t have a complete history of the home.
Some things to consider:
Is home construction date pre-1984? Before the mid-1980’s, home builders and contractors were allowed to use an adhesive on tile flooring that contained asbestos. This is not good.
Does tile appear to have an oily undertone? Some experts have found flooring might show a little bit of discoloring that appears almost “oily” in appearance. This is hard to determine if we don’t have any idea what it looked like when newly installed. And if it does have this appearance, it might be asbestos.
Damage or cracked tiles? You will want to investigate anything that shows damage like cracks or tears. You need to know what you are dealing with and treat it as a danger zone until you can confirm. Asbestos can leak through those cracks and tears and expose you and your family to harmful particles.
If even one of these questions is answered yes, STOP WORK and perform testing on the materials.
We used an at home kit from Pro-Lab.

For more information on asbestos risks, I recommend researching at asbestos.com


How to remove wall to wall carpet
Prepare the work area by emptying the room completely. If there is carpet in your closet, I would recommend you empty the closet completely as there may be dust from the carpet removal and you don’t want anything hanging in there that could hinder anyone’s view of the work needed on the floor.
Vacuum. I know this sounds weird, but a good vacuum will pick up extra dust before you start cutting and removing the carpet.
Gather all your tools. Refer to the list above.
You do not need to pull out baseboards unless they were installed above the carpet and you wish to fully remove the carpet, or if they are going to be replaced in your new design. If they do not need to be removed, leave them there. If you do want them removed/replaced, use your v-shaped flat head pry bar.
How to cut up carpet for disposal
Note: If you plan to reinstall carpet and the padding is still in good condition, you can use the same padding. Just be careful not to cut too deep when you cut the carpet. To do this, you will need to pull a corner of the carpet with your pliers and cut as you pull.
Believe it or not, you don’t need a fancy construction tool for this job. The best tool for cutting old carpet is a heavy duty utility knife. Make sure you are using one that has the safety features of retracting (if it doesn’t, don’t leave it lying around).
Use your pliers to pull carpet away from baseboards. Cut in small sections, about 12-18 inches in width and about 4-6 feet in length.

How to pull up carpet tack strips
Note: This section is if you are pulling out carpet and padding. You’ll need to follow a few steps to remove the tack strip, nails, and staples.
Use the flat end of your prybar to slide under the strip in somewhat of a straight up angle and then push the prybar (from the end where you are holding it) down. Do this all around the room. Don’t be afraid of the sound it’s going to make. I know it can be a bit nerve racking, but if you are using the right tools, you’re going to be okay.
Use the v-shape in the prybar to pull the nails out. This part can be tricky. You want to make sure you have a good fit under the nail. If you think it may be a tight fit, go for the smaller v-shaped puller.
Use your pliers to pull out staples you’ll find under the padding.


Watch hammer & spoons on YouTube!
This post was all about how we tackled a DIY home improvement project pulling up carpet.
We were fortunate to only need to clean the floors and seal. Check out these recommended products for caring for your wood floors.


