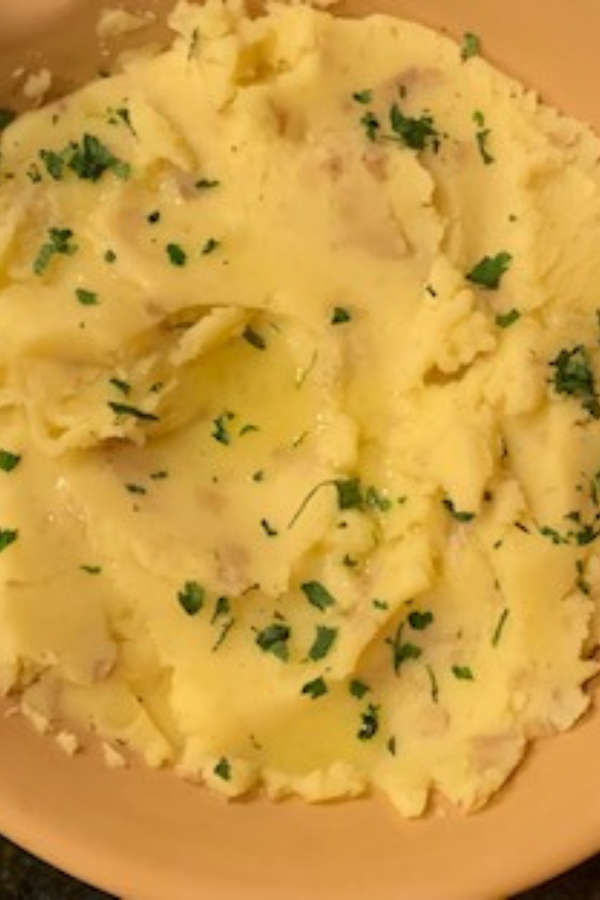
Roasted Garlic Mashed Potatoes
Everyone has a different recipe for mashed potatoes. This recipe is great if you are looking for extra flavor. Roasting the garlic before adding to the recipe is what really amps up the flavor.
This recipe is also a good as a make-ahead side dish. I’ve made this up to two weeks before Thanksgiving. I’ve included instructions in the recipe.

What kind of potatoes make the best mashed potatoes?
This recipe works well with any kind of potato. Here are some options:
- Russet is a dryer potato so you’ll get a thicker, firmer mashed potato result.
- Red potatoes are traditionally recognized as your go to for garlic potatoes, and with a thin skin you do not need to peel them.
- Yukon gold will give you more of a flavor packed potato as it has a buttery rich texture, as well as thin skin so you do not need to peel these either.
Do you need a hand mixer to make mashed potatoes?
No. You don’t need a hand mixer to make mashed potatoes. I’ve made this recipe multiple times alternating the use of a hand mixer or a potato ricer, but since I don’t like peeling the potatoes, I find the hand mixer is easier.
The potato riser is a good option to use for potatoes that have been peeled and will achieve a very creamy texture.
Another option would be a simple potato masher like this one. It’s inexpensive, always useful to have in the kitchen, and it will work just fine.
HAMMER & Spoons favorite kitchen tools for this recipe:
Hand mixer
Potato ricer (optional)
Freezer to oven safe casserole dish (if making ahead–also optional)
Some helpful tips:
- Potatoes absorb a lot of salt, so be generous with your seasoning!
- The garlic can be roasted in advance to cut down on cooking time.
- You can substitute the oil with a plant based butter (or butter).
- To save unused garlic, release each clove from the paper shell and place in a jar covered with olive oil and sealed. It can be stored in the refrigerator for up to 7 days. Be sure to strain the cloves from the oil before adding to a recipe.
- If heating up after frozen, cover in foil and heat at 375 degrees Fahrenheit for about 40 to 45 minutes.
Hope you enjoy this recipe it’s super easy, very economical, and packed with flavor!
Enjoy!

Roasted Garlic Mashed Potatoes
Notes
Tips:
Potatoes absorb a lot of salt, so be generous with your seasoning!
Olive oil can be substituted with plant based butter (or butter).
The garlic can be roasted in advance to cut down on cooking time.
To save unused garlic, release each clove from the paper shell and place in a jar covered with olive oil and sealed. It can be stored in the refrigerator for up to 7 days. Be sure to strain the cloves from the oil before adding to a recipe.
If heating up after frozen, cover in foil and heat at 375 degrees Fahrenheit for about 40 to 45 minutes.
Ingredients
- 1 - 2 heads garlic
- 2 teaspoon olive oil + 1-2 teaspoons
- 1 tablespoon sea salt (or kosher salt)
- 3 pounds red potatoes (or Yukon gold)
- 1/4 cup extra virgin olive oil
- 1/4 cup non-dairy milk (of choice)
- chopped parsley to taste
- cracked black pepper to taste
Instructions
- Roasting garlic:
- Heat oven to 400 degrees Fahrenheit
- Use a sharp knife trim off the top of the head of garlic to expose the cloves.
- Place the garlic on a large piece of aluminum foil and drizzle with a teaspoon of olive oil.
- Wrap the foil around the garlic to close and place an oven for 35 to 45 minutes or until the garlic is golden brown soft and very fragrant.
- Open the foil and allow the garlic to cool to room temperature until you can handle it. once it's cooled you can gently squeeze the narrow end of each clove to release it from its paper "shell".
- Potatoes:
- Dice the potatoes into 1-inch cubes (cleaned and unpeeled).
- Place into a large stock pot and fill with cold water--enough to cover by 2-inches
- Add a tablespoon of salt and heat over high heat to bring the water to boil.
- Once boiling, reduce the heat to maintain a simmer until the potatoes are cooked through--this should take about 10-12 minutes. They are ready when you can easily mash the flesh with a fork.
- Drain the potatoes then return them back to the hot pot--give them a quick toss to help evaporate any water clinging to the potatoes.
- Add the roasted garlic and olive oil and use a hand mixer to mash until the garlic cloves have been worked in and the potatoes are soft and fluffy--be sure all the skins are mashed as well.
- Add milk slowly to the potatoes and adjust as needed.
- Transfer to your serving dish and drizzle with additional olive oil if desired or melted butter of your choice and garnish with parsley serve immediately or let it cool to room temperature and freeze for a make ahead Thanksgiving side dish.


